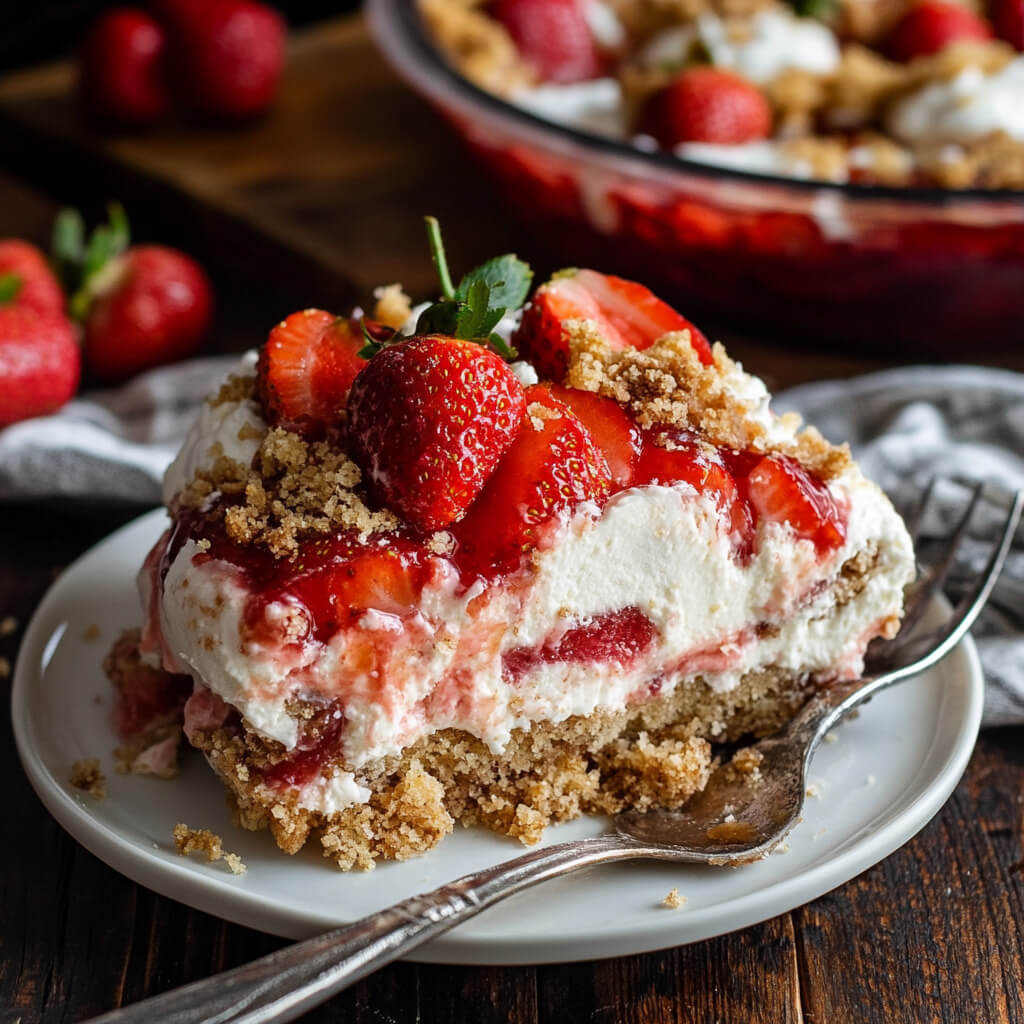
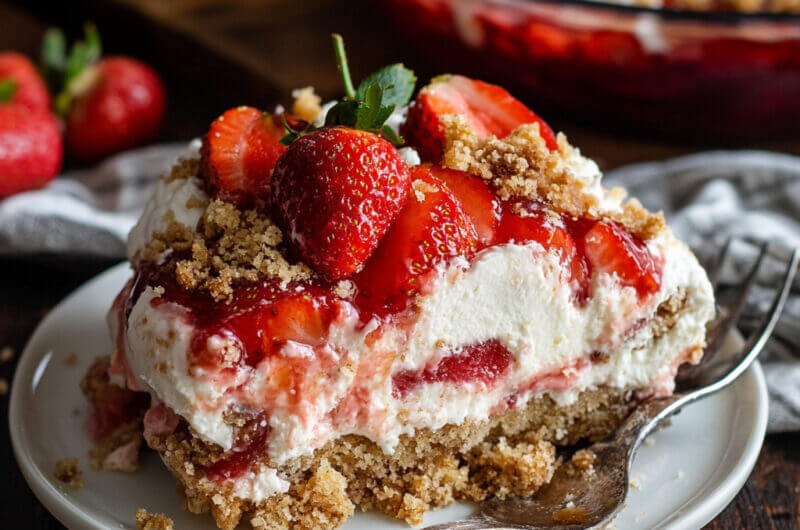
Strawberry Cheesecake Dump Cake
Last Thursday, I had one of those days—lesson plans running late, a sink full of dishes, and a cranky 5-year-old insisting strawberries are the only acceptable fruit. We had guests coming over for dinner, and I had zero energy left to bake something fancy. But I still wanted a dessert that felt a little special—something that said, “I tried,†even if I mostly didn’t.
I remembered this Strawberry Cheesecake Dump Cake I scribbled into my recipe notebook months ago after tasting something similar at a potluck. The name made me laugh the first time (dump what?)—but trust me, this is one of the easiest and most comforting desserts you’ll ever make.
It’s warm, gooey, buttery on top, and creamy in the center. With every bite, you get sweet strawberries, vanilla cake, and creamy cheesecake—no mixer gymnastics or perfect piping needed. And the best part? It comes together in one dish. No bowls to scrub, no frosting to whip.
That night, every last scoop disappeared. Even my strawberry-only child asked for seconds—with cream cheese on her nose and zero regrets.
Short Description
Strawberry Cheesecake Dump Cake is a ridiculously easy dessert that layers strawberry pie filling, fresh strawberries, sweetened cream cheese, and vanilla cake mix into one bubbly, buttery bake. It’s perfect for last-minute gatherings, potlucks, or anytime you want something indulgent with minimal effort.
Why You’ll Love This Recipe
You’ll love this because it’s the kind of dessert that looks like you spent an hour on it—but you didn’t.
It’s quick to prep, forgiving if you mess up the layers, and deliciously gooey with pockets of cheesecake goodness. Whether you’re a tired parent, an accidental host, or just craving something warm and sweet, this dump cake is here for you.
Ingredients
Main Ingredients
- 1 (21 oz) can strawberry pie filling
- 1 cup fresh strawberries, sliced
- 8 oz cream cheese, softened
- 1 large egg
- ½ cup white sugar
- 1 tsp vanilla extract
- 1 (15.25 oz) box vanilla cake mix
- 10 tbsp unsalted butter, melted
Optional Add-Ons
- A handful of chopped pecans or walnuts on top before baking
- Whipped cream or vanilla ice cream for serving
Tools & Equipment
- 9×13-inch baking dish
- Electric mixer or hand whisk
- Rubber spatula
- Measuring cups and spoons
Step-by-Step Instructions
Step 1: Preheat oven.
Preheat your oven to 350°F (180°C). Lightly grease a 9×13-inch baking dish.
Step 2: Add strawberry base.
Pour the strawberry pie filling into the baking dish. Gently fold in fresh sliced strawberries.
Step 3: Mix cream cheese filling.
In a bowl, beat cream cheese, egg, sugar, and vanilla until smooth and creamy. Drop spoonfuls evenly over the strawberry mixture.
Step 4: Layer cake mix.
Sprinkle the dry vanilla cake mix evenly over the cream cheese layer. Don’t stir—just let it sit as a dry layer.
Step 5: Add melted butter.
Drizzle melted butter evenly over the entire surface. Try to cover as much dry cake mix as possible.
Step 6: Bake.
Bake for 40–50 minutes, or until the top is golden brown and the edges are bubbly. Let stand for 10 minutes before serving.
Pro Tip: If some dry cake spots remain on top after baking, it’s okay. Those crispy bits add texture!
Notes & Variations
- No vanilla cake mix? You can substitute with yellow cake mix or even strawberry cake mix for an extra berry punch.
- Want more tang? Add a tablespoon of lemon zest to the cream cheese mixture.
- Going gluten-free? Use a gluten-free cake mix—the rest of the ingredients are already naturally GF.
- Too sweet? Swap out half the pie filling for lightly sweetened fresh berries to reduce sugar.
- Common mistake: Stirring the cake mix into the filling. Don’t! The layers should stay separate to create that creamy middle and buttery top.
Storage & Reheating
Leftover strawberry cheesecake dump cake can be covered and stored in the fridge for up to 4 days. Reheat individual portions in the microwave for 20–30 seconds to bring back that warm, gooey texture. You can also eat it cold—it tastes a bit like cheesecake bars the next day!
Serving and Pairing Suggestions
Serve warm with a scoop of vanilla ice cream or a generous dollop of whipped cream. It’s perfect for backyard BBQs, brunches, or just a Wednesday night when you want a treat. I also love it with a sprinkle of crushed graham crackers for that extra cheesecake crust vibe.
FAQs
1. Can I make this ahead of time?
Yes! Bake it earlier in the day and reheat in the oven at 300°F for about 10 minutes before serving.
2. Can I use frozen strawberries?
Fresh is best for texture, but you can use thawed frozen strawberries—just pat them dry to avoid excess liquid.
3. What if I don’t have cream cheese?
You can skip the cheesecake layer, but the texture won’t be as rich. Greek yogurt can be a tangy substitute in a pinch.
4. Can I freeze it?
Yes, freeze after baking. Cool completely, then wrap tightly. Reheat in the oven from frozen at 325°F until warmed through.
5. Is the butter necessary on top?
Yes. It helps cook the cake mix and gives it that crispy topping. Don’t skip it!
Strawberry Cheesecake Dump Cake
Course: Desserts12
servings10
minutes45
minutes320
kcal55
minutesIngredients
- Main Ingredients
1 (21 oz) can strawberry pie filling
1 cup fresh strawberries, sliced
8 oz cream cheese, softened
1 large egg
½ cup white sugar
1 tsp vanilla extract
1 (15.25 oz) box vanilla cake mix
10 tbsp unsalted butter, melted
- Optional Add-Ons
A handful of chopped pecans or walnuts on top before baking
Whipped cream or vanilla ice cream for serving
Directions
- Preheat your oven to 350°F (180°C). Lightly grease a 9×13-inch baking dish.
- Pour the strawberry pie filling into the baking dish. Gently fold in fresh sliced strawberries.
- In a bowl, beat cream cheese, egg, sugar, and vanilla until smooth and creamy. Drop spoonfuls evenly over the strawberry mixture.
- Sprinkle the dry vanilla cake mix evenly over the cream cheese layer. Don’t stir—just let it sit as a dry layer.
- Drizzle melted butter evenly over the entire surface. Try to cover as much dry cake mix as possible.
- Bake for 40–50 minutes, or until the top is golden brown and the edges are bubbly. Let stand for 10 minutes before serving.
Notes
- If some dry cake spots remain on top after baking, it’s okay. Those crispy bits add texture!