Frozen Greek Yogurt Peanut Butter Banana Cups
Every afternoon around 3:00, I hit that weird in-between zone—too late for lunch, too early for dinner, but my brain refuses to function without a pick-me-up. That’s when these Frozen Greek Yogurt Peanut Butter Banana Cups come to the rescue.
It all started as a way to use up overripe bananas and leftover yogurt. I had no intention of creating a new freezer staple, but the moment I popped one into my mouth—cold, creamy, slightly sweet with a hint of nutty richness—I knew this wasn’t just a snack. It was a solution. And now, I make a batch almost every Sunday.
They’re the perfect combo of protein and comfort. The bananas add natural sweetness, the yogurt brings that cool, tangy bite, and the peanut butter? It pulls everything together like a warm hug. This isn’t just “healthier.” It’s smart snacking done right.
Short Description
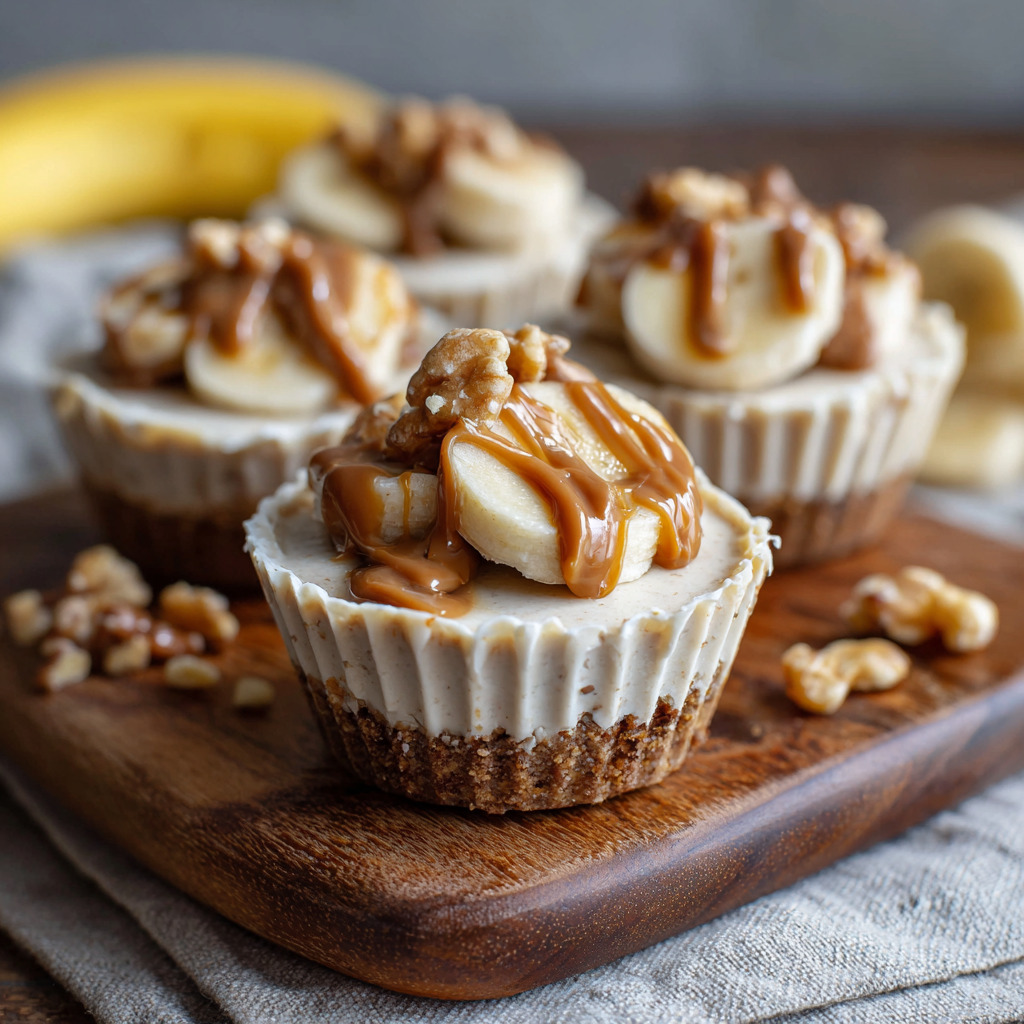
Frozen Greek Yogurt Peanut Butter Banana Cups are a chilled, bite-sized snack made with ripe bananas, creamy peanut butter, and tangy Greek yogurt. They’re easy to make, naturally sweet, and perfect for curbing cravings or cooling off on a hot afternoon.
Why You’ll Love This Recipe
- No baking, no stove, no stress
- Made with just a few wholesome ingredients
- High-protein, low-sugar, and totally satisfying
- Kid-approved, adult-obsessed
- Perfect for freezer snacks, breakfast bites, or dessert
Ingredients List
For the Cups
- 2 ripe bananas, mashed until smooth
- 1 cup plain or vanilla Greek yogurt
- 3 tbsp natural peanut butter (or almond butter)
- 1 tsp vanilla extract (optional)
- 1 tbsp honey or maple syrup (optional, depending on sweetness)
For the Topping (optional but fun)
- 2 tbsp mini chocolate chips
- Crushed peanuts or granola
- A drizzle of melted peanut butter or dark chocolate
Directions
Step 1: Mix the Base
In a medium bowl, combine mashed bananas, Greek yogurt, peanut butter, vanilla extract, and honey (if using). Stir until smooth and creamy.
Step 2: Fill the Molds
Spoon the mixture into a lined mini muffin tin or silicone mold, filling each cup almost to the top. Smooth the tops with the back of a spoon.
Step 3: Add Toppings
Sprinkle mini chocolate chips, crushed peanuts, or a light drizzle of extra peanut butter or melted chocolate over each cup.
Step 4: Freeze Until Firm
Place the tray in the freezer for at least 2–3 hours or until completely solid. Once frozen, pop them out and store in a freezer-safe container.
Step 5: Let Them Sit Before Eating
When ready to eat, let one sit at room temperature for 3–5 minutes for the perfect soft-but-chilled bite.
Cooking Notes & Common Mistakes
Make sure the bananas are well-mashed for a smooth texture—no chunky surprises.
Use silicone molds if you want easy release without fussing with paper liners.
And don’t skip the resting time before eating; straight from the freezer, they’re too hard to enjoy fully. Let them soften slightly, and the texture becomes dreamy.
Serving Suggestions & Pairings
Enjoy these as-is for a refreshing snack, or pair with a few fresh berries for a mini dessert plate. I’ve even tossed one in a smoothie to thicken it up and sneak in extra flavor.
They’re also perfect for school lunchboxes or after-workout cool-down treats.
Variations and Customizations
Nut-free? Use sunflower seed butter or tahini instead.
Want more crunch? Stir in chopped nuts or granola before freezing.
Sweeter tooth? Add a bit of maple syrup or top with crushed graham crackers.
Extra protein? Mix in a scoop of protein powder or collagen.
Storage & Reheating
Store these frozen cups in an airtight container in the freezer for up to 2 weeks.
No reheating needed—just thaw slightly before eating.
If you want a softer texture, leave one out for about 10 minutes, or microwave for 8–10 seconds (but not more or it will melt too much).
Frequently Asked Questions (FAQs)
1. Can I use flavored yogurt?
Yes, vanilla or honey Greek yogurt works great. Just reduce added sweeteners accordingly.
2. How ripe should the bananas be?
The riper the better—they should be soft and freckled for maximum sweetness and easy mashing.
3. Can I use almond butter instead of peanut butter?
Absolutely. Any nut or seed butter works, as long as it’s creamy and unsweetened.
4. Are these good for kids?
Yes! Kids love the creamy texture and subtle sweetness. Plus, they’re a healthy alternative to ice cream or packaged snacks.
5. Can I double the recipe?
Of course. Just make sure you have enough molds or mini liners and freezer space.
Conclusion
These Frozen Greek Yogurt Peanut Butter Banana Cups are my freezer’s best-kept secret. They’re the kind of snack that makes you feel good without trying too hard. No guilt, no crash, just cool, creamy satisfaction every time.
Try making a batch this week—I bet they won’t last long. And if you find your own favorite twist, tag me on Savoryandtasty. I’m always looking for new snack hacks to stash in my freezer drawer. Up next? A mocha almond version that might just change your life.
Frozen Greek Yogurt Peanut Butter Banana Cups
Difficulty: Easy12
servings10
minutes~90
kcal10
minutesCold, creamy, and crave-worthy, these Frozen Greek Yogurt Peanut Butter Banana Cups are the ultimate feel-good snack. They’re easy to make, kid-friendly, and perfect for curbing hunger between meals.
Ingredients
- For the Cups
2 ripe bananas, mashed until smooth
1 cup plain or vanilla Greek yogurt
3 tbsp natural peanut butter (or almond butter)
1 tsp vanilla extract (optional)
1 tbsp honey or maple syrup (optional, depending on sweetness)
- For the Topping
2 tbsp mini chocolate chips
Crushed peanuts or granola
A drizzle of melted peanut butter or dark chocolate
Directions
- In a medium bowl, combine mashed bananas, Greek yogurt, peanut butter, vanilla extract, and honey (if using). Stir until smooth and creamy.
- Spoon the mixture into a lined mini muffin tin or silicone mold, filling each cup almost to the top. Smooth the tops with the back of a spoon.
- Sprinkle mini chocolate chips, crushed peanuts, or a light drizzle of extra peanut butter or melted chocolate over each cup.
- Place the tray in the freezer for at least 2–3 hours or until completely solid. Once frozen, pop them out and store in a freezer-safe container.
- When ready to eat, let one sit at room temperature for 3–5 minutes for the perfect soft-but-chilled bite.
