Creamy No-Bake Peanut Butter Cheesecake Balls
One warm afternoon near Balboa Park, I spent a few hours volunteering at a small neighborhood event. Someone had set up a long folding table for drinks and homemade desserts, and the selection kept growing as people arrived with containers and trays. A family friend placed a plate of chocolate coated treats on the table, and within minutes they started disappearing one by one.
Curiosity got the better of me, so I asked her what was inside them. She smiled and explained that they were little cheesecake bites with peanut butter tucked in the center. No oven, no complicated steps, just a chilled dessert that could come together quickly. That detail caught my attention immediately. San Diego summers can be warm, and a no bake dessert always feels like a small victory.
Later that evening, I decided to experiment in my own kitchen. I wanted something creamy but structured enough to hold its shape. Graham cracker crumbs formed the base, a light cheesecake filling added softness, and a peanut butter center gave each bite a sweet surprise.
The final touch was a thin layer of chocolate that hardened into a delicate shell. The first batch came out exactly how I hoped. Cool, creamy, and just rich enough to feel special without being heavy.
Short Description
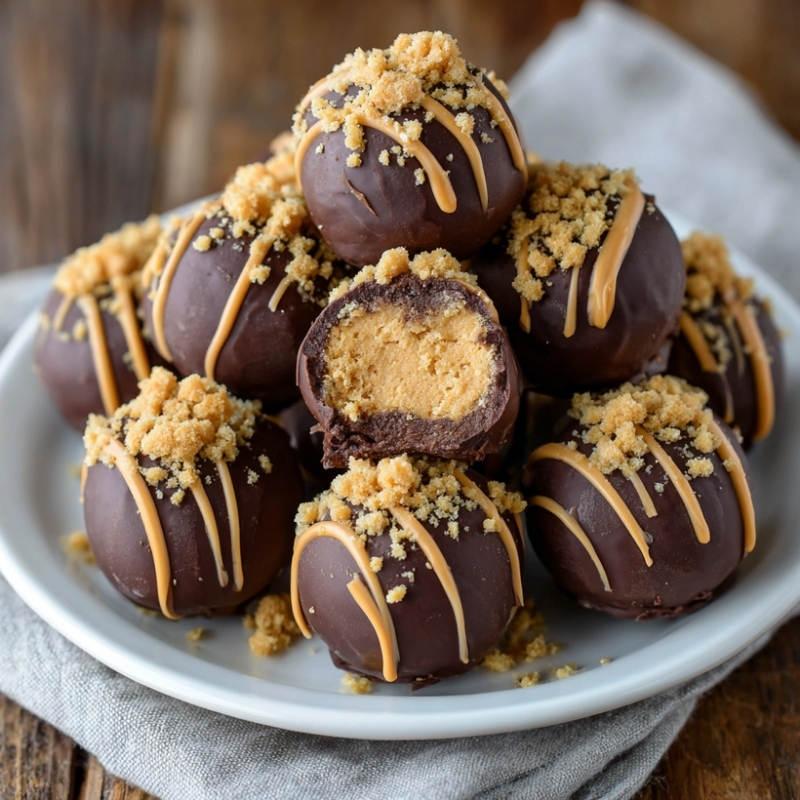
No Bake Peanut Butter Cheesecake Balls are creamy bite sized desserts with a graham cracker base, smooth cheesecake filling, and a sweet peanut butter center, all coated in a rich chocolate shell.
Key Ingredients
For the cheesecake base
- 1 ½ cups 150 g graham cracker crumbs or digestive biscuits, finely crushed
- 6 tablespoons unsalted butter, melted
- 2 tablespoons granulated sugar
For the cheesecake filling
- 8 oz 225 g cream cheese, softened
- ¼ cup granulated sugar
- ½ teaspoon vanilla extract
- ⅓ cup heavy cream or whipping cream
For the peanut butter core
- ½ cup creamy peanut butter
- 2 tablespoons powdered sugar
- Pinch of salt
For the chocolate coating
- 1 cup semi sweet chocolate chips or chopped dark chocolate
- 1 tablespoon vegetable oil or coconut oil
For garnish
- ¼ cup chopped toasted peanuts optional
- Melted peanut butter drizzle optional
Tools Needed
- Mixing bowls
- Electric hand mixer or whisk
- Silicone molds or mini muffin tin
- Rubber spatula
- Small saucepan or microwave safe bowl
- Parchment paper
- Baking sheet
Cooking Instructions
Step 1: Prepare the Graham Cracker Base
In a bowl combine the graham cracker crumbs, granulated sugar, and melted butter. Stir until the crumbs resemble damp sand and hold together when pressed. Spoon the mixture into silicone molds or a mini muffin pan lined with paper liners. Press the crumbs firmly into the bottom to form a compact base. Place the tray in the refrigerator and chill for about 15 minutes so the crust firms up.
Step 2: Make the Cheesecake Filling
In a mixing bowl beat the softened cream cheese with the granulated sugar until smooth and creamy. Add the vanilla extract and mix again until fully incorporated. In a separate bowl whip the heavy cream until soft peaks form. Gently fold the whipped cream into the cream cheese mixture using a spatula. The filling should look light and fluffy.
If the filling appears lumpy, the cream cheese may still be too cold. Continue mixing for another minute until smooth.
Step 3: Prepare the Peanut Butter Centers
In a small bowl combine the peanut butter, powdered sugar, and a pinch of salt. Stir until the mixture becomes thick and slightly moldable. Roll it into small balls about 1 teaspoon each. Place them on parchment paper while preparing the rest of the dessert.
Step 4: Assemble the Cheesecake Balls
Remove the chilled graham cracker bases from the refrigerator. Spoon about 1 tablespoon of cheesecake filling over each base. Place one peanut butter ball in the center of each portion and gently smooth the cheesecake filling over the top so the peanut butter core is hidden.
Step 5: Freeze to Firm Up
Place the molds in the freezer for about 15 minutes. This short freeze helps the cheesecake balls hold their shape and makes them easier to coat in chocolate.
Step 6: Prepare the Chocolate Coating
In a microwave safe bowl combine the chocolate chips and vegetable oil. Heat in 20 second intervals, stirring each time, until the chocolate becomes smooth and glossy. The oil helps create a thinner coating that spreads easily.
Step 7: Coat and Garnish
Remove the cheesecake balls from their molds. Dip each one into the melted chocolate or drizzle chocolate over the top using a spoon. Immediately sprinkle with chopped toasted peanuts if using. A light drizzle of melted peanut butter adds extra flavor.
Step 8: Chill Until Set
Place the coated cheesecake balls in the refrigerator for at least 1 hour until the chocolate shell becomes firm. Let them sit at room temperature for about 5 minutes before serving so the filling softens slightly.
Why You’ll Love This Recipe
Rich Creamy Texture: The cheesecake filling stays smooth and fluffy while the peanut butter center adds a sweet nutty bite.
No Oven Needed: Perfect for warm days when turning on the oven feels unnecessary.
Great for Gatherings: These bite sized desserts are easy to serve at parties or casual events.
Balanced Sweetness: Chocolate, peanut butter, and cream cheese create a dessert that tastes indulgent without feeling overly heavy.
Make Ahead Friendly: They store beautifully in the refrigerator and can be prepared in advance.
Mistakes to Avoid & Solutions
Using Cold Cream Cheese
Cold cream cheese can cause lumps in the filling. Let it soften at room temperature for about 30 minutes before mixing to ensure a smooth texture.
Overmixing the Whipped Cream
Whipped cream should form soft peaks before folding into the cheesecake mixture. If whipped too long it becomes stiff and difficult to blend smoothly.
Skipping the Freezing Step
The short freezer rest is important for shaping the cheesecake balls. Without it the filling may be too soft when dipping in chocolate.
Chocolate Too Thick
Chocolate that is too thick will not coat evenly. Adding a small amount of vegetable oil or coconut oil keeps the texture smooth and glossy.
Serving and Pairing Suggestions
Serve chilled on a dessert platter with fresh berries for contrast.
Pair with hot coffee or espresso for a balanced dessert moment.
Add them to a dessert buffet alongside brownies and cookies.
Plate them individually with a drizzle of chocolate sauce for an elegant presentation.
Storage and Reheating Tips
Store cheesecake balls in an airtight container in the refrigerator for up to 4 days.
Place parchment paper between layers to prevent sticking.
Freeze for up to 1 month if longer storage is needed.
Thaw frozen cheesecake balls in the refrigerator for several hours before serving.
FAQs
1. Can I use crunchy peanut butter instead of creamy?
Yes, crunchy peanut butter adds extra texture inside the cheesecake balls.
2. Do I need silicone molds for this recipe?
No. A mini muffin tin with paper liners works well as an alternative.
3. Can I use milk chocolate instead of dark chocolate?
Absolutely. Milk chocolate creates a sweeter coating while dark chocolate adds a slightly richer flavor.
4. How small should the peanut butter centers be?
About 1 teaspoon each works well so the center stays balanced with the cheesecake layer.
5. Can these be made a day ahead?
Yes. They actually taste even better after chilling overnight because the flavors have time to blend.
Tips & Tricks
Lightly toast the peanuts for garnish to enhance their flavor.
Use a cookie scoop for evenly sized cheesecake portions.
If chocolate begins to thicken during dipping, warm it gently again.
Chill the molds on a flat tray so the cheesecake layers stay even.
Recipe Variations
Chocolate Cookie Version
Replace graham cracker crumbs with crushed chocolate sandwich cookies. Follow the same steps for preparing the crust and filling.
Almond Butter Cheesecake Balls
Substitute almond butter for peanut butter in the core. Mix almond butter with powdered sugar and salt, then shape and assemble as usual.
Caramel Peanut Butter Twist
Place a small caramel candy inside the peanut butter center before rolling into balls. Continue assembling the cheesecake balls and coat with chocolate.
Final Thoughts
No Bake Peanut Butter Cheesecake Balls bring together a handful of simple ingredients in a way that feels both playful and satisfying. The combination of creamy cheesecake, sweet peanut butter, and a thin chocolate shell creates layers of texture that keep each bite interesting.
That afternoon at the community event near Balboa Park ended with a nearly empty dessert table and a handful of new recipe ideas. Small treats like these have a way of connecting people around simple moments. A tray of chilled cheesecake bites placed in the center of a table often sparks the same reaction. Curious smiles, quick second helpings, and conversations that linger long after dessert.
Final Thoughts
I love desserts that look impressive but come together with simple ingredients and a little patience. These peanut butter cheesecake balls fall right into that category. The creamy filling, the soft graham base, and the chocolate coating create a balance of textures that feels satisfying in every bite.
They also travel well, which makes them perfect for gatherings. I often bring a tray to casual get togethers or neighborhood potlucks, and they tend to disappear faster than expected. Watching people reach for a second one always makes me smile.
Recipes like this remind me that desserts do not have to be complicated to feel memorable. Sometimes a few familiar flavors, thoughtfully layered together, create the kind of treat people talk about long after the plate is empty.
Creamy No-Bake Peanut Butter Cheesecake Balls
Course: DessertDifficulty: Easy18
servings25
minutes75
minutesNo Bake Peanut Butter Cheesecake Balls are creamy bite sized desserts with a graham cracker base, smooth cheesecake filling, and a sweet peanut butter center, all coated in a rich chocolate shell.
Ingredients
For the cheesecake base
1 ½ cups 150 g graham cracker crumbs or digestive biscuits, finely crushed
6 tablespoons unsalted butter, melted
2 tablespoons granulated sugar
For the cheesecake filling
8 oz 225 g cream cheese, softened
¼ cup granulated sugar
½ teaspoon vanilla extract
⅓ cup heavy cream or whipping cream
For the peanut butter core
½ cup creamy peanut butter
2 tablespoons powdered sugar
Pinch of salt
For the chocolate coating
1 cup semi sweet chocolate chips or chopped dark chocolate
1 tablespoon vegetable oil or coconut oil
For garnish
¼ cup chopped toasted peanuts optional
Melted peanut butter drizzle optional
Directions
- Combine graham cracker crumbs, granulated sugar, and melted butter in a bowl. Stir until the texture resembles damp sand and holds when pressed.
- Spoon the mixture into silicone molds or a mini muffin pan lined with paper liners. Press firmly to form a compact base. Refrigerate for about 15 minutes until the crust firms.
- Beat the softened cream cheese with granulated sugar until smooth and creamy.
- Mix in the vanilla extract. In a separate bowl whip the heavy cream until soft peaks form, then gently fold it into the cream cheese mixture with a spatula until light and fluffy. If the mixture looks lumpy, continue mixing briefly until smooth.
- In a small bowl stir together peanut butter, powdered sugar, and a pinch of salt until thick and moldable. Roll into small balls about 1 teaspoon each and place them on parchment paper while preparing the rest.
- Remove the chilled graham bases from the refrigerator. Spoon about 1 tablespoon of cheesecake filling over each base. Place one peanut butter ball in the center and gently cover it with more filling so the core is hidden.
- Freeze the molds for about 15 minutes so the cheesecake balls firm up and hold their shape for coating.
- Combine chocolate chips and vegetable oil in a microwave safe bowl. Heat in 20-second intervals, stirring each time, until the chocolate becomes smooth and glossy.
- Remove the cheesecake balls from the molds and dip each one into the melted chocolate or drizzle the chocolate over the top. Immediately sprinkle with chopped toasted peanuts if using, and drizzle a little melted peanut butter for extra flavor.
- Refrigerate for at least 1 hour until the chocolate shell sets. Let them rest at room temperature for about 5 minutes before serving so the filling softens slightly.