Nostalgic Raspberry Zinger Poke Cake
A few months ago I spent a Saturday morning wandering through the Hillcrest farmers market with a canvas tote and no real plan for dinner. That happens more often than I admit. I go out for herbs or fruit and come home with half a dozen random ingredients and a head full of recipe ideas. That morning, a vendor was selling fresh raspberries that looked so vibrant they almost didn’t seem real.
While I was chatting with the farmer, a woman next to me mentioned a dessert her grandmother used to make with raspberry gelatin and coconut. The description stopped me in my tracks. Sweet berries, soft cake, and that fluffy whipped topping sounded like the kind of nostalgic dessert you might spot on a church potluck table.
Later that afternoon, my neighbor’s daughter stopped by while I was testing the recipe. She had been riding her bike around the block and peeked into the kitchen when she saw the mixing bowls on the counter. When the cake came out of the refrigerator and I sliced the first piece, the bright raspberry color running through the cake made her eyes widen.
That was the moment I knew the recipe worked. Soft white cake soaked with raspberry gelatin, a thin layer of preserves, cool whipped topping, and coconut sprinkled across the top. It tasted cheerful, light, and just sweet enough to make everyone reach for another slice.
Short Description
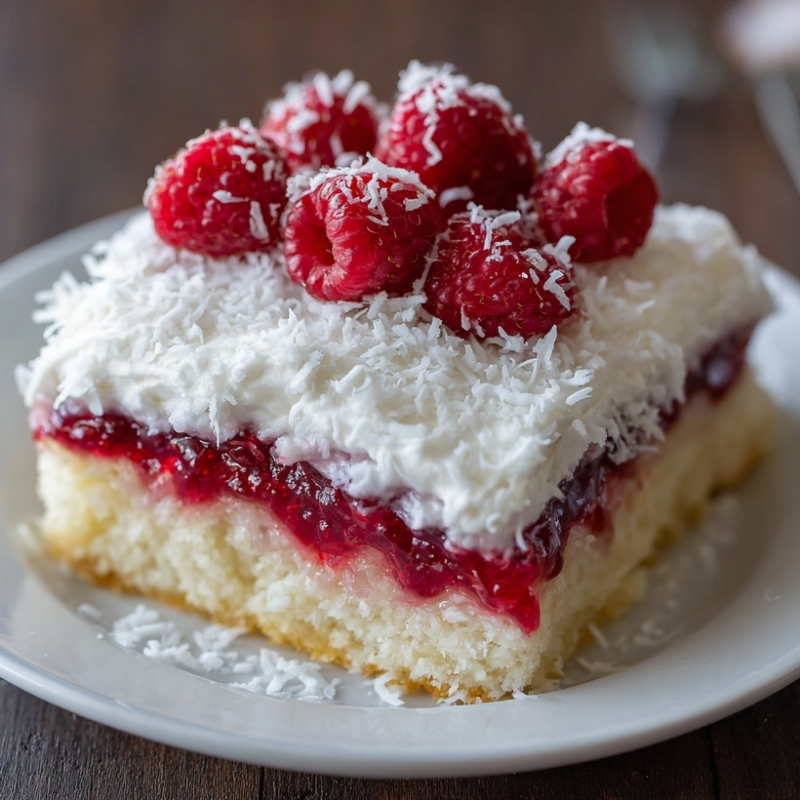
Raspberry Zinger Poke Cake is a soft white cake infused with raspberry gelatin, layered with raspberry preserves, topped with fluffy whipped topping, and finished with shredded coconut for a bright, nostalgic dessert.
Key Ingredients
For the cake
- 1 box 18.25 oz white cake mix plus ingredients listed on the box
For the raspberry layer
- 1 box 3 oz raspberry flavored gelatin
- 2 cups hot water
- 1 jar 10 oz raspberry preserves
For the topping
- 1 tub 8 oz Cool Whip, thawed
- 1 bag 7 oz shredded coconut
Tools Needed
- 9 × 13 inch baking pan
- Large mixing bowl
- Hand mixer or whisk
- Wooden spoon handle or skewer
- Measuring cup
- Small microwave safe bowl
- Rubber spatula
- Offset spatula or spoon for spreading
Cooking Instructions
Step 1: Bake the White Cake
Prepare the white cake mix according to the instructions on the box. Pour the batter into a greased 9 × 13 inch baking pan. Bake at 350 °F for 25 to 30 minutes until the top is lightly golden and a toothpick inserted in the center comes out clean. Remove the cake from the oven and let it cool in the pan for about 30 minutes.
If the cake still feels warm when touched, allow a few extra minutes of cooling so the gelatin layer does not melt unevenly.
Step 2: Poke the Cake Surface
Once the cake has cooled slightly, use the handle of a wooden spoon to poke holes across the entire surface. Space the holes about 1 inch apart. Push the handle about halfway into the cake so the gelatin can seep into the interior.
These holes allow the raspberry gelatin to soak through the cake, creating that signature moist texture.
Step 3: Prepare the Raspberry Gelatin
In a heatproof bowl dissolve the raspberry gelatin powder in 2 cups hot water. Stir for about 1 minute until the powder fully dissolves and the liquid becomes clear with no visible granules.
Slowly pour the warm gelatin evenly over the entire cake, letting it run into the holes. Take your time so the liquid spreads across the surface rather than pooling in one corner.
Step 4: Add the Raspberry Preserves
Place the raspberry preserves in a microwave safe bowl and warm for about 30 seconds until slightly loosened. Stir gently, then spread the preserves evenly across the cake using the back of a spoon or an offset spatula.
The preserves add a deeper berry flavor and create a glossy layer on top of the gelatin soaked cake.
Step 5: Spread the Whipped Topping
Using a spatula, spread the thawed Cool Whip evenly over the entire surface of the cake. Smooth it gently so the topping forms a soft, even layer from edge to edge.
If the whipped topping feels stiff, let it sit at room temperature for a few minutes before spreading.
Step 6: Sprinkle the Coconut
Scatter the shredded coconut across the whipped topping, covering the entire cake. The coconut adds a light texture and gives the cake that classic raspberry zinger look.
Step 7: Chill the Cake
Place the cake in the refrigerator and chill for at least 4 hours. This resting time allows the gelatin to fully set and helps the flavors blend together.
The cake should feel cool and firm when sliced.
Why You’ll Love This Recipe
Flavor Packed Dessert: The raspberry gelatin and preserves create bright berry flavor in every bite.
Soft and Moist Texture: Poking the cake allows the gelatin to soak through the crumb, keeping it tender.
Easy to Make: This recipe relies on simple ingredients and minimal preparation.
Perfect for Gatherings: The colorful layers make it ideal for potlucks, birthdays, and casual celebrations.
Refreshing and Light: The whipped topping and fruit flavors keep the dessert from feeling overly heavy.
Mistakes to Avoid & Solutions
Pouring Gelatin Over a Hot Cake
If the cake is too warm, the gelatin may run straight to the bottom instead of soaking evenly. Let the cake cool for about 30 minutes before pouring.
Not Poking Enough Holes
Too few holes means the gelatin cannot penetrate the cake properly. Make sure the holes are spaced about 1 inch apart across the entire surface.
Using Cold Preserves
Cold preserves can tear the cake surface when spreading. Warm them briefly so they glide easily over the cake.
Skipping the Chill Time
The cake needs at least 4 hours in the refrigerator so the gelatin can set. Cutting too early will cause the layers to slide.
Serving and Pairing Suggestions
Slice into squares and serve chilled for a refreshing dessert.
Pair with iced tea or cold brew coffee for a balanced sweet treat.
Add fresh raspberries on top for a brighter presentation.
Serve on a dessert buffet alongside brownies, lemon bars, or cookies.
Storage and Reheating Tips
Store the cake covered in the refrigerator for up to 4 days.
Use plastic wrap or an airtight container to prevent the topping from drying out.
This cake is best served chilled and does not require reheating.
If transporting, keep the cake refrigerated until just before serving.
FAQs
1. Can I make this cake a day ahead?
Yes. In fact, the flavor improves after several hours in the refrigerator, making it perfect for preparing the night before.
2. Can I use homemade whipped cream instead of Cool Whip?
Yes. Whip about 1½ cups heavy cream with a few tablespoons of powdered sugar until soft peaks form and spread it over the cake.
3. What if I cannot find raspberry gelatin?
Strawberry gelatin works well as a substitute and still gives a bright fruit flavor.
4. Can I reduce the sweetness?
You can use unsweetened whipped cream instead of Cool Whip and reduce the preserves slightly.
5. Why is my cake too soggy?
Too much gelatin poured in one spot can oversaturate the cake. Pour slowly and distribute evenly.
Tips & Tricks
Use a wooden spoon handle for evenly sized holes.
Toast the coconut lightly in a skillet for extra flavor before sprinkling.
Refrigerate the cake uncovered for the first hour so the topping firms up.
Slice with a clean knife wiped between cuts for neat squares.
Recipe Variations
Coconut Raspberry Layer Cake
Bake the cake as directed, then slice it horizontally into two layers after cooling. Spread half the raspberry preserves and whipped topping between the layers before finishing the top with coconut.
Strawberry Zinger Version
Replace raspberry gelatin and preserves with strawberry versions. Follow the same steps to create a strawberry flavored poke cake.
Chocolate Raspberry Twist
Bake a chocolate cake mix instead of white cake. Continue with raspberry gelatin, preserves, and whipped topping for a richer dessert.
Final Thoughts
This Raspberry Zinger Poke Cake reminds me how much joy a simple dessert can bring to a kitchen. The moment you cut into it and see the bright raspberry color running through the cake, it feels playful and inviting. It is the kind of dessert that sparks conversation before the first bite even happens.
Watching that neighbor kid take her first forkful made the whole afternoon feel worthwhile. She looked at the slice, then back at the cake pan, already calculating whether a second piece might be possible. That reaction alone convinced me the recipe was worth sharing.
Sometimes a dessert does not need complicated layers or fancy techniques. A soft cake, a burst of raspberry flavor, and a cool cloud of whipped topping can easily turn an ordinary afternoon into something memorable. In my kitchen, that is always the goal.
Nostalgic Raspberry Zinger Poke Cake
Course: DessertDifficulty: Easy12
servings15
minutes30
minutes4
hoursRaspberry Zinger Poke Cake is a soft white cake infused with raspberry gelatin, layered with raspberry preserves, topped with fluffy whipped topping, and finished with shredded coconut for a bright, nostalgic dessert.
Ingredients
For the cake
1 box 18.25 oz white cake mix plus ingredients listed on the box
For the raspberry layer
1 box 3 oz raspberry flavored gelatin
2 cups hot water
1 jar 10 oz raspberry preserves
For the topping
1 tub 8 oz Cool Whip, thawed
1 bag 7 oz shredded coconut
Directions
- Prepare the white cake mix according to the package instructions. Pour the batter into a greased 9 × 13 inch baking pan and bake at 350 °F for 25 to 30 minutes, until the top is lightly golden and a toothpick inserted in the center comes out clean.
- Let the cake cool in the pan for about 30 minutes. If it still feels warm, allow a few extra minutes so the gelatin layer will not melt unevenly.
- Use the handle of a wooden spoon to poke holes across the surface of the cake, spacing them about 1 inch apart. Push the handle about halfway into the cake so the raspberry gelatin can seep into the interior and create a moist texture.
- Dissolve the raspberry gelatin powder in 2 cups hot water in a heatproof bowl. Stir for about 1 minute until the powder completely dissolves and the liquid becomes clear. Slowly pour the warm gelatin evenly over the cake, letting it flow into the holes rather than pooling in one spot.
- Warm the raspberry preserves in a microwave safe bowl for about 30 seconds until slightly loosened. Stir gently, then spread the preserves evenly across the surface using the back of a spoon or a spatula.
- Spread the thawed Cool Whip over the cake in an even layer, smoothing it gently from edge to edge. If the topping feels stiff, let it rest at room temperature for a few minutes before spreading.
- Sprinkle the shredded coconut evenly over the whipped topping so the entire cake is lightly covered.
- Refrigerate the cake for at least 4 hours until the gelatin fully sets and the layers become chilled and firm enough to slice.